Make native app iPad format
While uploading to App Store Connect the following errors appeared:
1 package(s) were not uploaded because they had problems:
/var/folders/ds/1sw7c6h53fnc2195dk95rjvdq477hx/T/00503D97-5319-4AA8-B76B-B03E42FE630E/1489699915.itmsp - Error Messages:
ERROR ITMS-90023: “Missing required icon file. The bundle does not contain an app icon for iPad of exactly ‘167x167’ pixels, in .png format for iOS versions supporting iPad Pro.”
ERROR ITMS-90023: “Missing required icon file. The bundle does not contain an app icon for iPad of exactly ‘152x152’ pixels, in .png format for iOS versions >= 10.0.”
To solve this,
I created the 2 missing icons.
Add them to the bundle via Xcode, commit and push changes: https://developer.apple.com/library/archive/documentation/ToolsLanguages/Conceptual/Xcode_Overview/AddingImages.html
Changes to the Contents.json file in the commit (result of the Xcode changes):
Also the two icons were uploaded (icon_ipad_***.png):
Now the build runs fine on ipad in Testflight.
This is the amazingly clear answer I got from Feddo (Mendix support):
By default, iPads aren't enabled as targets for Mendix native apps, as Apple has far stricter rules for releasing tablet apps. For example, apps have to behave nicely in any rotation and resolution. This requires extra care from developers to style their app correctly. Rotation of the app is disabled for the same reason, as this could create confusion.
However, you can enable iPads as targets for your application. Please note that native apps running on iPads might require additional styling.
To enable iPads as targets, you will have to update your copy of the NativeTemplate repository that was created to build your app. You can change some files directly in your repository, or you can do this using XCode. As you're using XCode to sign the app, I will describe the steps you'll need to take to enable iPads using XCode.
To update your repository using XCode, you'll need a local copy of the repository on the device that runs XCode. You can do this using the git clone command, https://git-scm.com/book/en/v2/Git-Basics-Getting-a-Git-Repository, or using XCode.
To do this in XCode, follow these steps:
1. On the XCode start window, selectr Clone an existing project
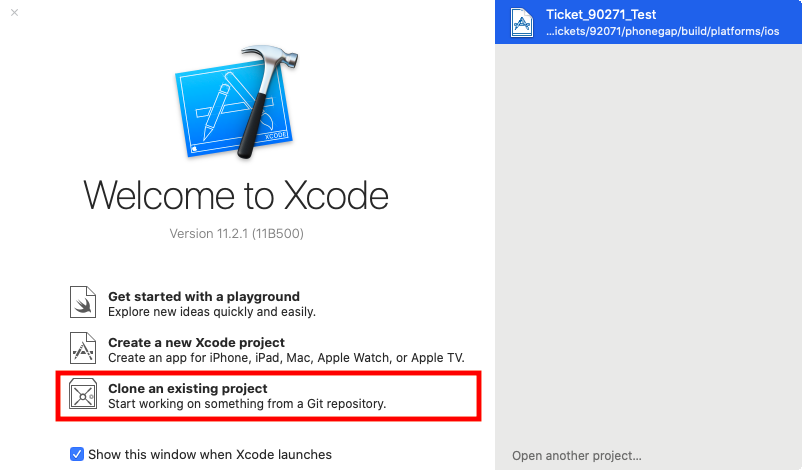
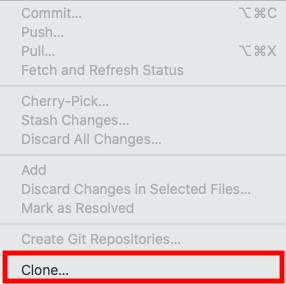
Alternatively, you can select Source Control > Clone.
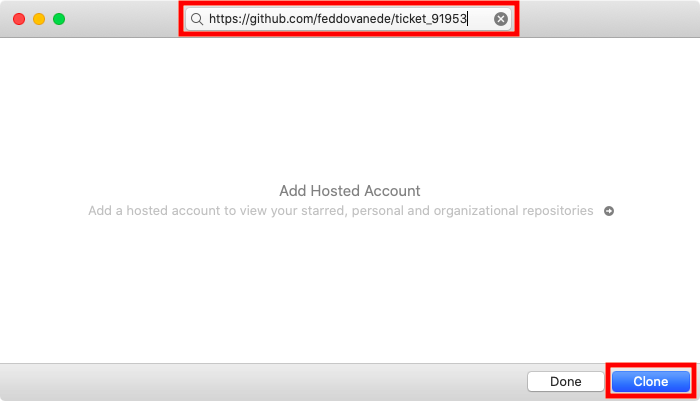
2. In the dialog, enter the URL for your copy of the Native Template repository, that was created when preparing the build of your app. Click Clone.
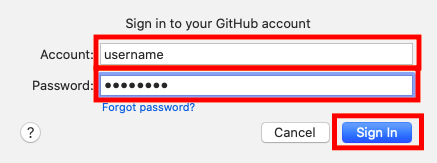
3. When prompted, enter you GitHub account and password, and click Sign In.
4. When signed in, double-check you're cloning the correct repository, make sure the master branch is selected, and click Clone.
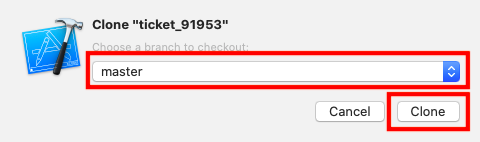
5. Select a location for the local copy of your repository.
Once you have a local copy of your repository, follow these steps to enable iPads as targets for your app:
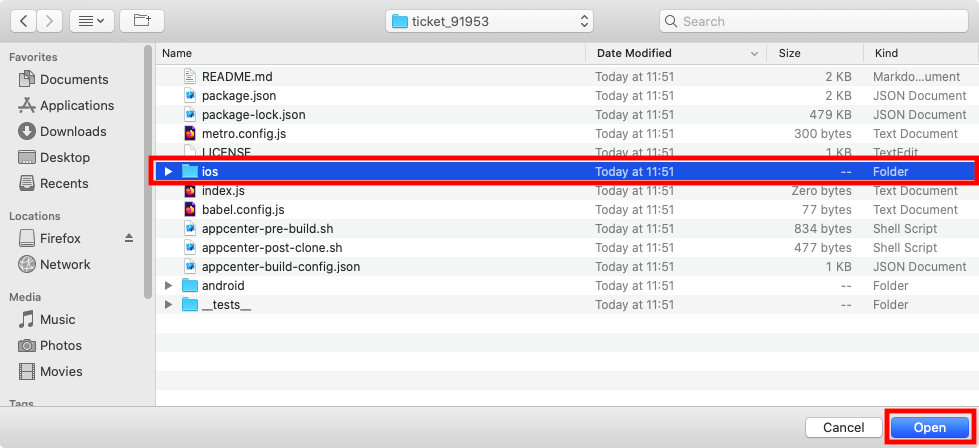
1. In XCode, select File > Open. Navigate to the local copy of your repository, select the ios folder and click Open.
2. When the project is opened, select the Project navigator (top-left) and select the nativeTemplate project (this is the default name, if you changed this, the name will be different). In the center window, on the left hand side, select the nativeTemplate target under Targets. In the top of the center window, select the General tab. Check the following options under Deployment info:
- Under devices
iPhoneiPad
- Under Device Orientation
PortraitLandscape LeftLandscape Right
- Under Statusbar Style
- Requires full screen

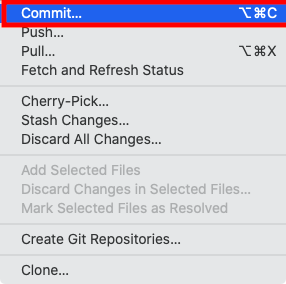
3. Commit the changes you made to your local copy to the repository, by selecting Source Control > Commit
4. Enter any commit message and select Commit.
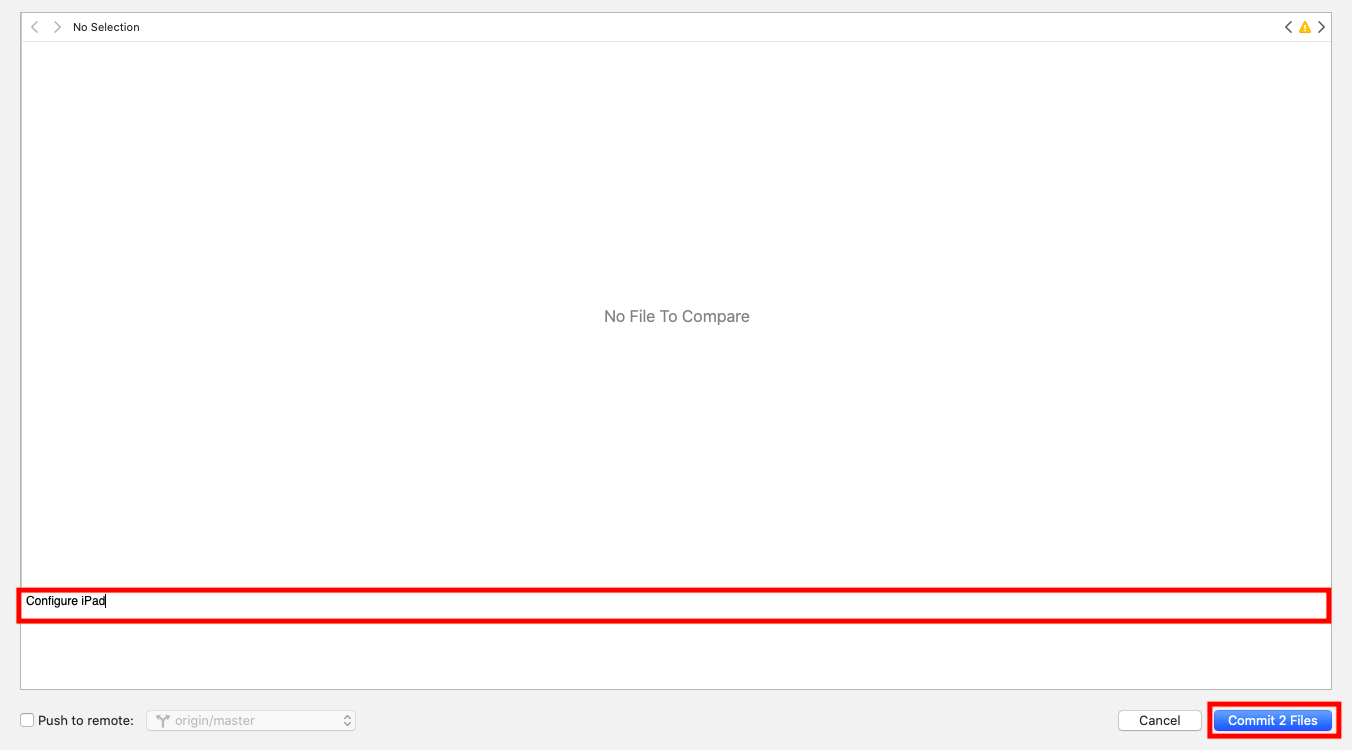
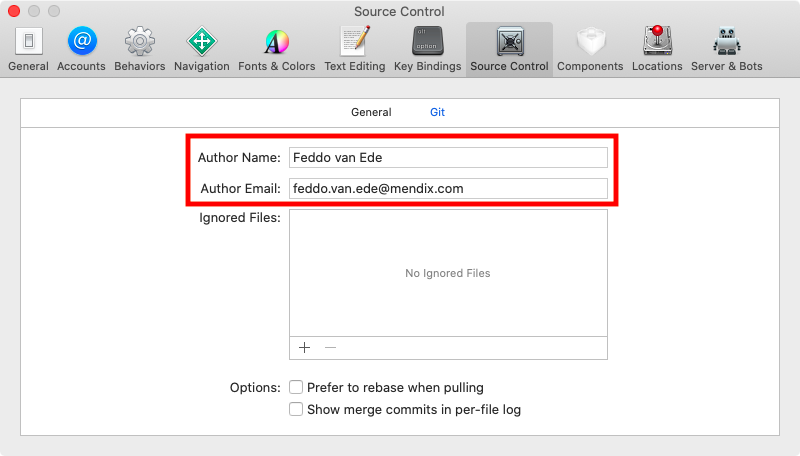
5. If prompted, enter an Author Name and Author Email. Close the settings dialog to return to the commit dialog and click Commit again.
When your change to enable iPads as targets is committed, use the Native Builder again to create a new build of your app. This will create a new branch for your build, or update the existing branch, based on the updated master branch, and will have iPads as targets enabled.
After making the change to enable iPads in Xcode, these are the changes in the commit: